Simulation Review
Precision over Prediction
The Art of the Key Level Rejection: XAUUSD (Gold)
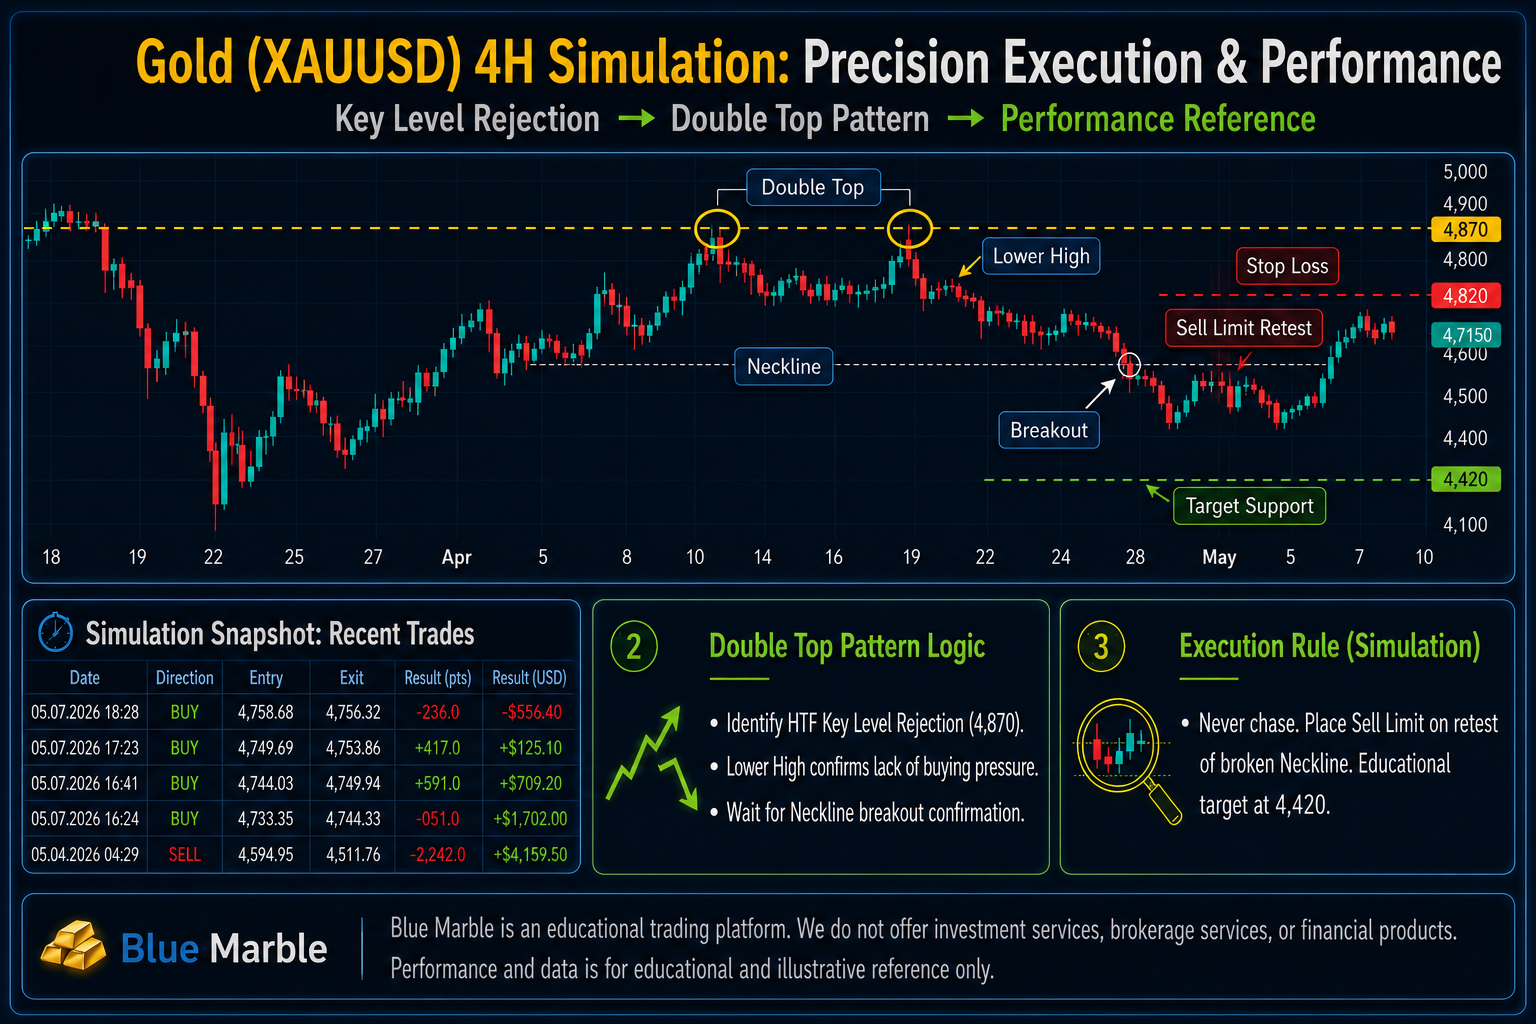
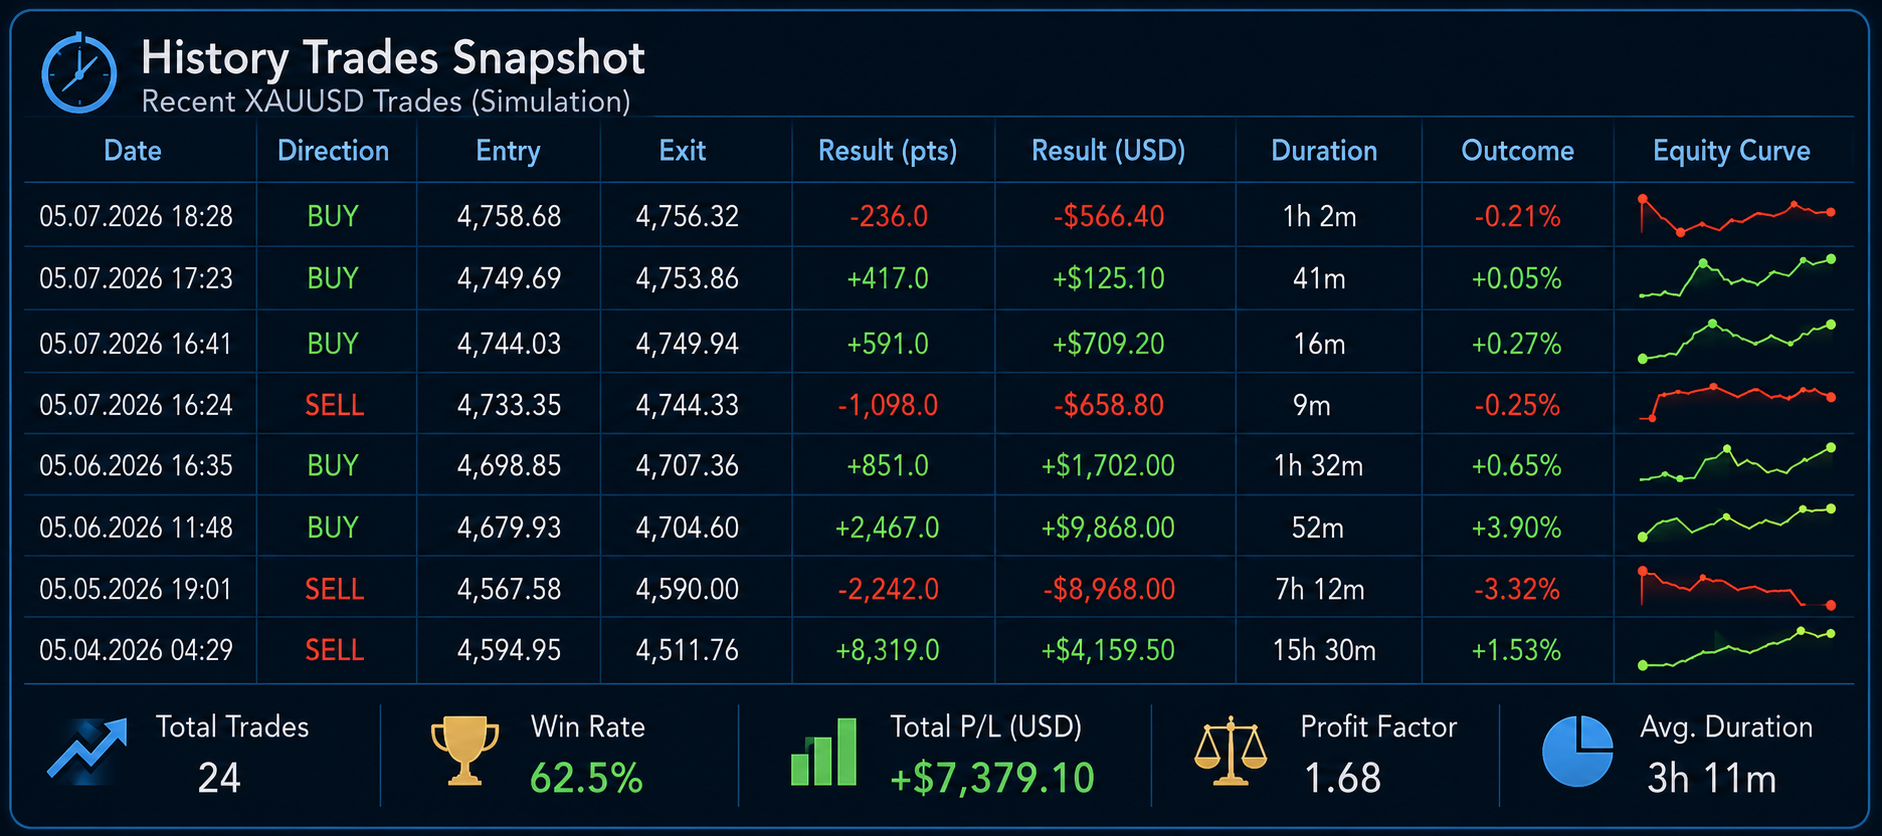
This week, our simulation focused on XAUUSD. In our curriculum, we don't just "guess" where the market might turn; we wait for the price to arrive at a pre-defined area of historical significance.
The Setup: Identifying the "TOP"
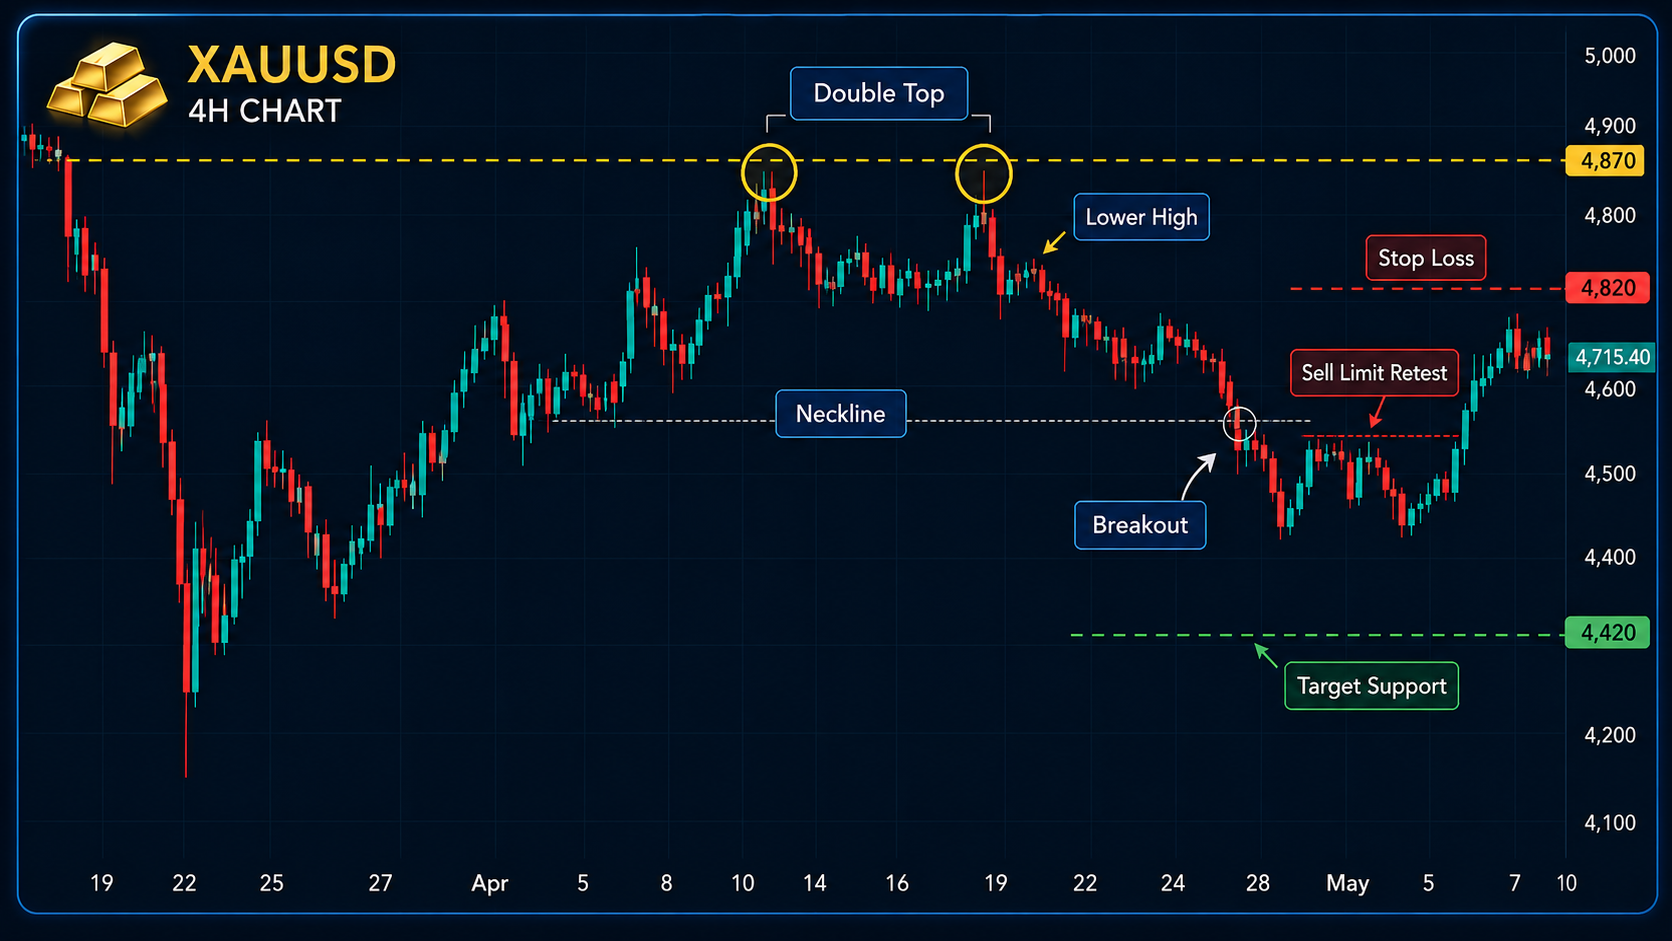
Following the rules in Module 1 (Page 16), we established our boundaries by identifying a Strong Horizontal Resistance zone before looking for an entry.
The Execution: The "DOWN" Pattern
Once price interacted with our Key Level, we shifted to lower time frames to find our Internal Participation Units. We identified a textbook Double Top with a Lower High:
- The Pattern: As defined in Module 2 (Page 18), the second peak failed to reach the height of the first.
- The Trigger: We remained disciplined and waited for the Neckline Breakout to confirm bear control.
The Strategy: Order Placement & Risk
In this simulation, we utilized a Sell Limit Order to avoid "chasing" momentum:
- Entry Zone: Retest of the broken neckline (Module 3, Page 16).
- Performance Reference: Stop Loss placed safely above the lower high (Module 3, Page 24).
- Exit Target: Educational target set at the next major Horizontal Support.
Educational Takeaway: According to Module 2 (Page 30), a Double Top without a HTF Key Level has a high probability of being a "False Breakout." Always ensure your "DOWN" pattern is supported by your "TOP" structure.
COACH'S NOTE
Discipline is not about trading every move; it's about only participating when all the "Marbles" align.
🛡️ Mandatory Disclaimer: Blue Marble is an educational trading platform. We do not offer investment services, brokerage services, or financial products. These are reviews of past/current setups for learning purposes only. No ownership. No custody. No guarantee.